Connect to MongoDB Atlas Using Robo 3T (Robomongo)
/If you use Robomongo you probably already know that Robomongo was acquired by 3T Software. With their first release, Robo 3T v1.1, we now have support for MongoDB 3.4 and some new features around working with your clusters in Atlas. Here is a quick guide on using Robo3T to connect to your MongoDB 3.4 replica set in Atlas.
We are going to assume you have already setup your cluster in Atlas. When you went through the configuration the first time you should have been asked to setup your Atlas admin account, we will use this to connect to the MongoDB instance.
Open Robo 3T and click the file option, then click connect. Click the create button at the top of this window to create a new connection. For the Type, we are going to select Replica Set. Give it a friendly name and then enter the members of your replica set in Atlas.
IMPORTANT - As of writing this you can only connect with the Replica Set connection type if you are connecting as an Atlas admin, which we are doing in the first image below. If you want to connect as a basic user, maybe a user that has only read access to a specific database, you would change the connection type to Direct Connection and and use the primary member to connect. See the second image that follows for reference. All other steps in this guide are the same for either connection type.

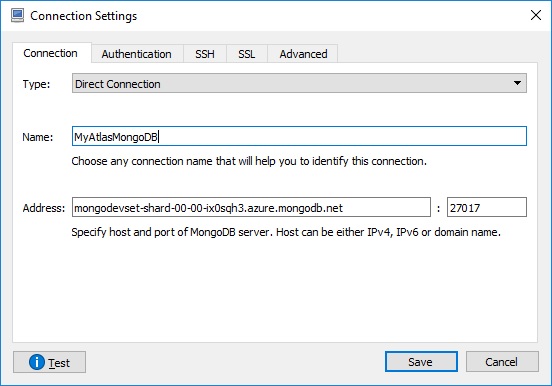
You can find the node details in Atlas by clicking on Clusters and then clicking on the Data button. Scroll down the the section titled "Connect with the Mongo Shell". If you look at the connection string on this page and then look at the example in the images above, you can see what parts we parse out for the individual replica set members. Find your replica set members and enter them like you see in the images above. The set name is optional. Now we are ready to click on the Authentication tab up top.
On the Authentication tab, click the checkbox Perform Authentication. Our Atlas admin account is automatically added to the admin database when we stand up our first cluster, so you shouldn't have to add. For the User credentials enter your Atlas admin account and the password and select SCRAM-SHA-1 for the Auth Mechanism. If you were using a basic user account, you will still authenticate with the admin database since all users authenticate with the admin db in Atlas. Another important note, all user need to be created in the Atlas security interface, you cannot create users through the shell.

We can skip the SSH tab, so let's click on the SSL tab. Check the box "Use SSL protocol. For your authentication method select Self-signed Certificate.

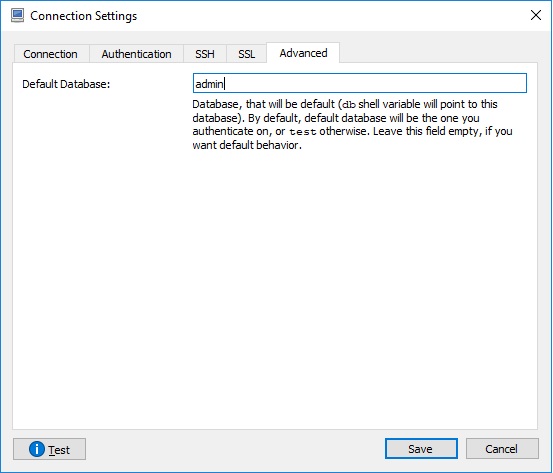
Finally, click on the Advanced tab. For the Default Database we are going to use the admin database.
Click the Save button and then click Connect to connect to your Atlas replica set. At this point your should see all 3 nodes of your replica set under the Replica Set folder and under the System folder you should see your system databases. If you have created other databases you will see them listed below these folders.
IMPORTANT - If you are connecting as a user with limited access such as a read only user with access to a single database, when you connect to your Mongo Atlas instance you might not actually see the databases you are permissioned to. You can still type "use <database name>" to switch to the database you have permissions in but you might not see it listed in the Robo 3T interface.